


What Are the Best Safety Lockout Devices?
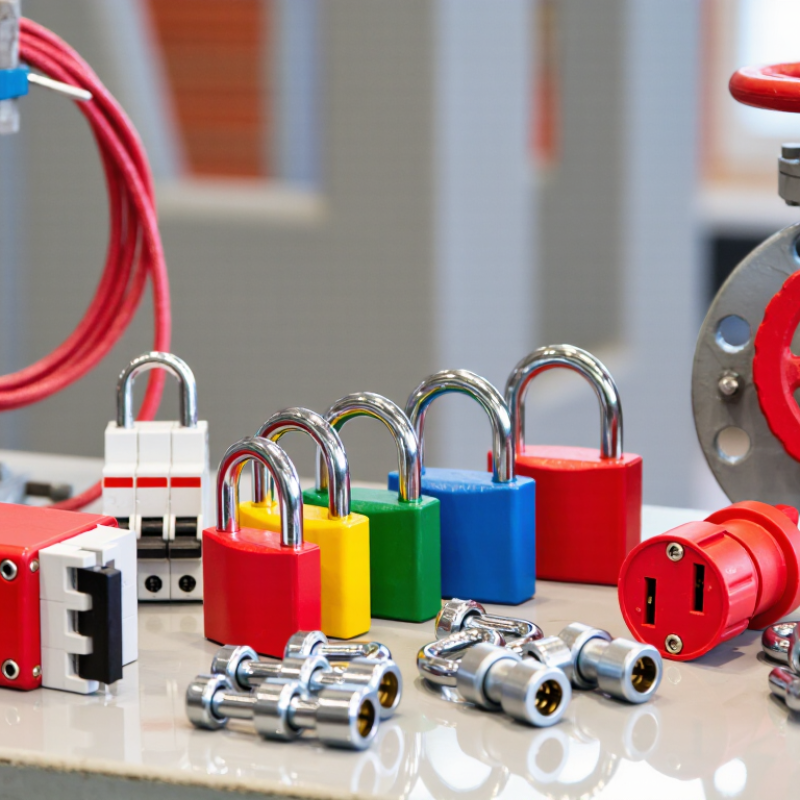
Choosing the best Safety Lockout devices starts with understanding the equipment, energy sources, and tasks involved. A padlock may secure a simple switch, while a valve lockout or cable device may be better suited to less standard controls. The right choice should fit the isolation point securely and remain easy for authorized workers to identify. Small details matter. A loose-fitting device can undermine confidence in the process.
This guide explores common device types, including safety padlocks, circuit-breaker lockouts, plug lockouts, valve covers, and hasps. It considers practical factors such as compatibility, durability, visibility, and ease of use. For example, a worker wearing gloves should be able to apply the device without forcing it into place. Clear labels also help teams recognize who applied a lock and why equipment remains out of service.
There is no single device that suits every workplace. Equipment designs vary, and a product that works well on one panel may not fit another. Selection should follow the manufacturer’s instructions and the site’s established energy-control procedures. When details are uncertain, check the equipment and consult qualified safety personnel rather than guessing. That extra check can feel slow. It is still worth doing. This overview offers a practical starting point, not a substitute for a site-specific assessment.
Understanding the Purpose of Safety Lockout Devices
Safety lockout devices help prevent machines from starting while people inspect, clean, or repair them. Their purpose is simple: keep hazardous energy controlled until work is complete. A lock on an electrical disconnect, valve, or breaker can make the isolation point visible and harder to operate by mistake. A tag adds information, such as who applied the lock and why. These devices do not remove danger by themselves. Workers still need to identify every energy source, follow site procedures, and verify that equipment cannot start before beginning work.
Choosing a suitable device depends on the equipment and the energy involved. A breaker lockout should fit the specific control; a valve device must hold the valve in its safe position. Durable materials matter in oily, dusty, or damp work areas. During maintenance, I have seen small details cause confusion: an unreadable tag or a lock placed on the wrong isolation point. Clear identification and careful checks are not glamorous, but they matter. One rushed step can undermine the whole process.
Tips: Match the device to the isolation point, use a uniquely assigned lock, and keep the tag readable. After applying it, test the equipment using the established verification procedure. If the machine still responds, stop and reassess the isolation. Even familiar equipment can surprise you.
Common Types of Safety Lockout Devices
Safety lockout devices protect workers from unexpected energy release during maintenance. The right device must match the energy source, equipment design, and work conditions. A padlock is the basic control. It secures an isolation point and identifies the person responsible for the lock.
A hasp allows several workers to attach personal locks to one isolation point. This is useful during team maintenance. Circuit breaker lockouts fit selected breaker shapes and prevent electrical reactivation. Fuse lockouts serve a similar purpose where removable fuses control power. Always test compatibility before an emergency shutdown.
Valve lockouts cover hand wheels, levers, and other valve controls. Ball valve devices hold the handle in a fixed position. Gate valve covers surround the wheel and block movement. Cable lockouts offer flexibility around unusual valves or several nearby controls. Plug lockouts enclose electrical plugs and help prevent reconnection. Group lockout boxes keep one key under controlled access when many workers share a procedure.
Tags add visible information, but they do not replace a physical lock. A durable tag should show the worker’s name, date, and warning message. Check for heat, chemicals, tight spaces, and poor visibility before choosing materials. A device can look secure and still fail to fit. That mistake happens.
Effective lockout depends on isolation, release of stored energy, and verification with suitable test equipment. Inspect devices regularly for cracks, bent parts, or unreadable labels. In practice, rushed selection creates avoidable gaps. Review the procedure after near misses, because the first version may not expose every weakness.
How to Choose the Right Lockout Device
Choosing the right lockout device starts with the machine, not the padlock. Identify every energy source, including electrical feeds, compressed air, hydraulic pressure, and stored springs. A device must physically prevent the specific control from moving or reconnecting. For example, a breaker lockout should fit the breaker handle snugly, while a valve cover must match the valve’s shape and size. If it slips or leaves the control reachable, it is not a reliable fit. Test the fit during planning, before maintenance begins.
Consider the worksite, too. Dust, moisture, oil, and temperature changes can affect materials and visibility. Choose a device that remains durable and easy to identify in those conditions. For shared work, use a group lockout arrangement that lets each worker apply a personal lock.
Then verify isolation with the equipment’s approved test method; a locked switch alone does not prove energy is absent. Follow site procedures and involve trained maintenance staff when energy controls are unclear.
Some equipment has awkward, modified controls, and a standard device may not work as expected. That is a reason to pause and reassess, not improvise a workaround. The right choice should be secure, visible, compatible, and practical for the person applying it.
Where Safety Lockout Devices Are Used
Safety lockout devices are used wherever workers service equipment that can start unexpectedly or release stored energy. In factories, technicians may lock a conveyor’s electrical disconnect before clearing a jam. At a water-treatment site, a valve lock can help isolate a pressurized pipe. Workshops, warehouses, and building-maintenance rooms also use lockout devices on electrical, hydraulic, pneumatic, and steam systems. The setting changes, but the practical question stays the same: can every relevant energy source be isolated and verified?
OSHA estimates that effective lockout/tagout practices can prevent about 120 fatalities and 50,000 injuries each year in the United States. Its hazardous-energy control standard covers servicing and maintenance where unexpected startup or energy release could injure workers. A lockout has to fit the actual isolation point: a breaker, plug, valve, or group lockbox may call for different hardware. Workers should also check for trapped pressure, gravity loads, or stored electrical charge after isolation. A tag alone does not physically stop a machine. Small details matter. A mislabeled valve can confuse even an experienced crew, so site procedures and equipment labels need regular review.
How to Apply, Inspect, and Maintain Lockout Devices
A lockout device only works when it fits the energy source and stays secure. Before applying one, identify every supply point, including electrical disconnects, valves, and stored pressure. Shut down the equipment using its normal procedure. Then isolate each source and release stored energy, such as air trapped in a hose or heat inside a vessel. Verify isolation with the proper test method. A handle that looks off is not proof. Not quite.
Choose a device that fully covers or blocks the control and cannot be removed without deliberate effort. Apply a personal lock and clear identification at each isolation point. Check that the device does not interfere with nearby controls or leave a gap where the switch can move. On a crowded panel, take a moment to confirm the correct breaker; labels can be worn or misleading. That extra check is easy to skip.
Inspect devices before and after use. Look for cracks, bent parts, worn edges, missing keys, or labels that can no longer be read. Remove damaged equipment from service rather than making a quick repair with tape. Store clean, dry devices in a designated location, and keep different sizes organized. Review procedures when machinery changes, and make sure workers know how to verify isolation. Small habits matter. People still miss things. A brief, documented inspection can reveal a device that no longer grips securely.
What Are the Best Safety Lockout Devices? — How to Apply, Inspect, and Maintain Lockout Devices
| Device type | Typical application | How to apply | Inspection points | Maintenance and replacement |
|---|---|---|---|---|
| Safety padlock | Secures an energy-isolating device in its safe position; commonly used for individual worker protection. | After shutting down equipment and isolating its energy sources, place the lock on the isolating device and retain the key under the authorized worker’s control. | Check that the lock body, shackle, and key mechanism are intact; confirm it is identifiable and appropriate for the workplace lockout program. | Keep clean and dry. Remove damaged, sticking, or otherwise unreliable locks from service; do not substitute an uncontrolled spare key. |
| Lockout hasp | Allows multiple workers to attach their own locks to one isolation point. | Fit the hasp securely to the isolation point. Each worker whose protection depends on the lockout attaches their own lock before work begins. | Check for cracks, bent parts, corrosion, and a secure fit. Verify that the hasp cannot be removed while any attached lock remains in place. | Store in a dry location and keep moving parts clean. Replace a hasp that is damaged, altered, or no longer fits the intended isolation point securely. |
| Circuit-breaker lockout | Prevents operation of a compatible electrical circuit breaker during servicing. | Use a device designed for the breaker type and position it so the breaker cannot be switched on. Apply a personal lock and follow the site electrical safety procedure. | Confirm compatibility and secure engagement. Check for cracks, worn clamping parts, or looseness that could allow breaker operation. | Keep the device free of debris and inspect before use. Replace it if it no longer holds firmly or has visible damage. Do not rely on it instead of verifying electrical isolation. |
| Plug lockout device | Encloses an electrical plug to prevent it from being inserted into an outlet while equipment is serviced. | Place the unplugged plug inside the enclosure, close it fully, and secure the enclosure with a lock. Keep the plug under the control of the worker where practicable. | Check that the enclosure closes and locks securely, fits the plug, and has no cracks or damaged locking points. | Store away from excessive heat and chemicals unless the device is rated for those conditions. Replace a damaged enclosure or one that does not fully contain the plug. |
| Valve lockout device | Restrains a compatible valve handle or handwheel to control hazardous fluid, gas, steam, or other process energy. | Place the valve in the position required by the energy-control procedure, fit the device securely, and attach a lock. Release or restrain stored pressure as required by the procedure. | Verify that the device fits the valve and cannot be moved or removed in a way that changes the valve position. Check for wear, corrosion, and damaged fasteners. | Clean after exposure to process residues and store appropriately. Replace devices that have become brittle, deformed, or unreliable in the operating environment. |
| Cable lockout device | Secures multiple or irregular isolation points when a dedicated device is not suitable and the equipment-specific procedure permits its use. | Route the cable through the designated isolation points, remove slack as designed, and secure it with the required personal locks. | Inspect the cable for fraying, kinks, corrosion, and damaged ends. Confirm the locking mechanism operates and the cable cannot be readily released. | Keep the cable clean and avoid sharp bends or unauthorized alterations. Remove it from service if strands are broken or the locking mechanism is faulty. |
| Group lock box | Supports group lockout for complex work involving multiple energy-isolating devices and multiple workers. | Secure the keys to the isolation-point locks inside the box according to the written procedure. Each authorized worker attaches a personal lock to the box before work starts. | Check the enclosure, hasps, and locking points. Confirm the written procedure accounts for all energy sources and that each affected worker can apply their personal lock. | Keep the box and its contents organized, legible, and protected from damage. Investigate missing keys or damaged parts before relying on the system. |
| Lockout tag | Provides a visible warning and identifies the person responsible when used with a lockout device; a tag alone does not physically restrain an energy-isolating device. | Attach it securely at the isolation point. Include the information required by the site procedure, such as the worker’s identity and the reason for the lockout. | Check that the tag is legible, securely attached, and positioned to be seen. Ensure it communicates the intended warning. | Replace tags that are torn, faded, wet, or illegible. Use durable tags suitable for the environment and follow the site’s tagout requirements. |
Important: Select devices for the specific energy-isolating equipment and work environment. Follow the employer’s written energy-control procedure, applicable regulations, and manufacturer instructions. Before work begins, verify isolation and control or release stored energy; a push button, selector switch, or control circuit is not an energy-isolating device.


