


How to Bend WPC Boards Safely?
Bend Wpc safely requires more than applying heat and forcing a board into shape. Wood-plastic composite behaves differently from solid wood, PVC, and ordinary decking. Its plastic content softens gradually, while its wood fibers can scorch, split, or permanently weaken. A safe method begins with the manufacturer’s bending limits, board profile, moisture condition, and recommended temperature range.
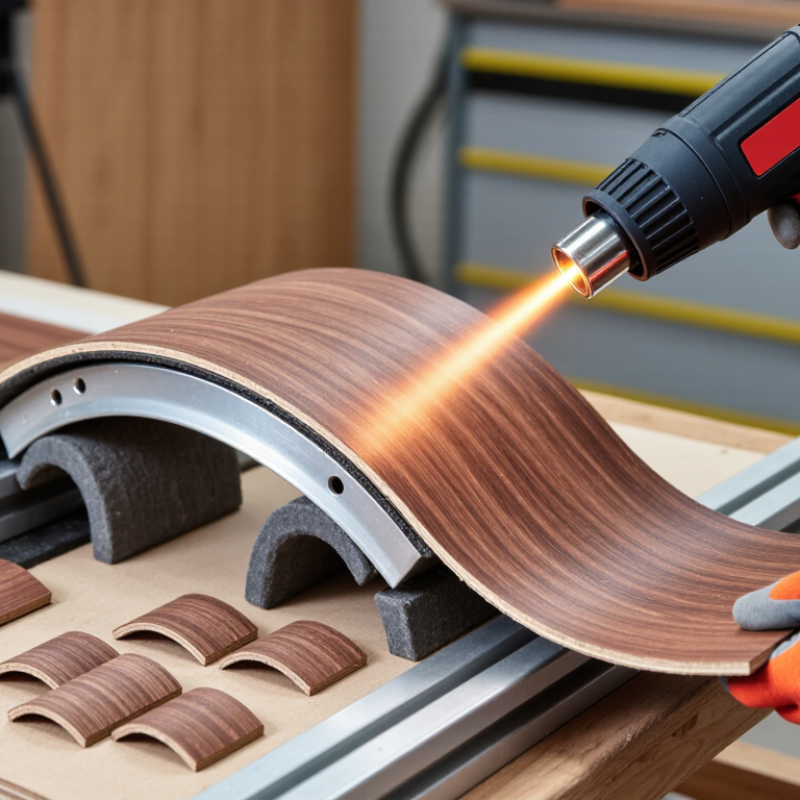
Daniel Harper, a WPC fabrication specialist, offers a practical reminder: “A smooth curve is useful only when the board keeps its strength afterward.” That principle guides this article. Bend Wpc projects should use controlled heat, steady support, and a generous bending radius. A heat gun can create hot spots, so move it continuously across the surface. Never hold it close to one area for too long. The surface may look acceptable while the inner layers deform.
Wear heat-resistant gloves, eye protection, and suitable clothing. Work in a ventilated area, away from combustible materials. Secure the board with a form or jig before heating it. Apply pressure slowly. Sudden force can produce white stress marks, cracks, or spring-back. Hollow boards need special caution because their internal webs may collapse.
A small test piece is wise. It reveals timing, flexibility, and surface changes before valuable material is used. Even careful work can fail. I would not call any bending method foolproof, especially when board formulas vary between manufacturers. Let the shaped board cool completely before removing supports. Then inspect the curve, edges, and fastening zones for hidden damage.
Identify Resin Type, Thickness, and ASTM D790 Flexural Data
How to Bend WPC Boards Safely?
Bending a WPC board starts with identifying its resin type. Thermoplastic WPC can soften under controlled heat, while thermoset material may crack instead. Check the technical sheet, not just the surface appearance. Resin content also affects stiffness, heat response, and recovery after bending. A board with recycled fillers may behave less consistently.
Thickness changes the bending risk dramatically. A 6 mm board may form around a modest curve, but a 20 mm board needs much more heat and force. Measure the intended radius and test a small offcut first. Warm the board evenly, using temperature monitoring rather than guesswork. Protect your hands and keep the material supported. Never force a cold board. It can split internally before damage becomes visible.
ASTM D790 flexural data provides useful evidence for comparison. Flexural modulus indicates resistance to bending, while flexural strength shows the load limit during testing. Flexural strain helps estimate how much deformation the specimen tolerated. However, ASTM D790 results do not guarantee performance in a heated, curved installation. Test conditions, specimen direction, moisture, and thickness all matter.
WPC boards can also show surface whitening after forming. That may signal stress, not merely a cosmetic defect. In my experience, the first sample often looks acceptable but relaxes overnight. I now inspect it again after 24 hours. That extra check has prevented rushed decisions, although it cannot replace project-specific testing.

Use the Manufacturer’s Processing Range; Typical WPC Heating Is 80–160°C
How to Bend WPC Boards Safely?
WPC boards soften gradually, not instantly. Follow the manufacturer’s processing range before applying any bending force. Typical WPC heating falls between 80 and 160°C, depending on polymer type, wood content, thickness, and moisture. The European Commission’s Joint Research Centre reports that polymer composites can show significant stiffness changes near their softening range. This matters during controlled forming.
Use an infrared thermometer, not guesswork. Heat both faces evenly, keeping the board supported along its full length. A practical workshop method is to begin near 80–100°C, then increase slowly toward 120–160°C when the board remains resistant. Avoid open flames and concentrated heat. Surface scorching can appear before the core becomes flexible. It smells sharp. Stop immediately.
A 2023 review in Construction and Building Materials identifies processing temperature as a major factor affecting WPC strength, deformation, and surface quality. Higher temperatures may improve flexibility, but excessive exposure can degrade wood fibres or cause polymer discoloration. ASTM D648 data also shows that polymer composites lose stiffness as temperature approaches their heat-deflection range. The exact response differs between formulations. I would not treat 160°C as a universal target. It is only an upper reference within many processing guidelines. Test a short offcut first, measure spring-back after cooling, and record the heating time. My own practical mistake was trusting the surface temperature alone; the board’s center was still noticeably cooler.
| Processing Dimension | Recommended Guidance | Typical Reference Range | Why It Matters | Safety Check |
|---|---|---|---|---|
| Material identification | Confirm the polymer matrix, wood-fiber content, board thickness, additives, and surface finish before heating. | Varies by formulation | WPC boards do not have one universal forming temperature. PE-, PP-, and PVC-based products soften at different temperatures. | Required before processing |
| Manufacturer’s processing window | Use the supplier’s documented heating and forming range whenever it is available. Do not rely on a generic temperature alone. | Typically 80–160°C | The approved range is based on the board’s polymer, fillers, moisture level, and production process. | Primary control limit |
| Initial heating | Heat gradually and evenly with a controlled oven, infrared heater, or hot-air system. Avoid concentrating heat on one small area. | Begin at the lower end of the approved range | Gradual heating reduces surface scorching, uneven softening, warping, and internal stress. | Use temperature monitoring |
| Softening verification | Start a small trial bend only after the board becomes sufficiently flexible. Do not force a cold or partially heated board. | Product-specific | Insufficient heat can cause cracking, while excessive heat can cause distortion, blistering, or surface damage. | Test a sample first |
| Heating uniformity | Heat both faces or move the heat source as needed to achieve an even temperature through the working area. | Uniform across the bend zone | Temperature differences through the thickness can create uneven curvature and residual stress. | Check the full bend area |
| Bending radius | Use the largest practical inside radius and increase the radius if the board shows whitening, cracking, or surface separation. | Depends on thickness and formulation | A tighter radius increases tensile strain on the outside of the bend and raises the risk of failure. | Determine by trial bending |
| Forming speed | Bend smoothly and steadily after the board reaches the required forming condition. Avoid sudden impact or sharp kinks. | Slow, controlled movement | Controlled forming helps distribute strain and reduces cracking or delamination. | Do not force the bend |
| Holding during cooling | Keep the board supported in the desired shape until it cools and becomes dimensionally stable. | Until near room temperature | Cooling under restraint helps reduce spring-back and preserves the formed shape. | Use a stable fixture |
| Moisture condition | Process clean, dry boards and follow the product’s storage and conditioning instructions. | Product-specific | Moisture can contribute to steam, bubbles, surface defects, and inconsistent forming when heated. | Keep material dry |
| Temperature measurement | Measure the board surface and, where practical, verify the temperature in the heated zone rather than relying only on heater settings. | Within the approved processing window | Air temperature and actual board temperature can differ significantly during heating. | Use a calibrated thermometer |
| Overheating indicators | Stop heating if there is smoke, strong odor, bubbling, discoloration, charring, melting, or rapid surface gloss change. | Outside the approved range | These signs may indicate thermal degradation, which can weaken the board and release irritating fumes. | Stop and ventilate |
| Ventilation and PPE | Work in a well-ventilated area and use heat-resistant gloves, eye protection, and suitable protective clothing. | Required for hot-work operations | Heated polymers and wood fibers may produce irritating vapors or hot particles, especially if overheated. | Follow site safety rules |
| Final inspection | After cooling, inspect the bend for cracks, whitening, delamination, blistering, permanent warping, and unacceptable spring-back. | Acceptance criteria should be project-specific | Visual defects can indicate overstressing or an unsuitable heating and forming method. | Approve before installation |
Set a Minimum Bend Radius of 10× the Board Thickness
How to Bend WPC Boards Safely?
Set a Minimum Bend Radius of 10× the Board Thickness
A practical starting point is a minimum bend radius of 10 times the board thickness. A 20-millimeter board therefore needs at least a 200-millimeter radius. This rule reduces surface cracking, whitening, and permanent deformation during controlled bending. It is not a universal guarantee. WPC formulations vary widely in fiber content, polymer type, moisture absorption, and temperature resistance.
Use gradual heat, not a sudden flame. Keep the board evenly warmed across its full width, then bend it around a smooth former. Sharp edges create concentrated stress. ASTM D790 and ISO 178 are widely used for flexural testing, but neither standard defines a safe installation radius. Their results should support the design, not replace a site trial. Testing normally requires controlled conditions, such as 23°C and 50% relative humidity under ASTM D618.
Measure the radius at the board’s inner surface. Clamp spacing matters. Excessive pressure can crush the outer skin before bending begins. I would test one sample first, then inspect both faces after cooling for hairline cracks. The 10× guideline is conservative, yet it may still fail with cold, aged, or heavily filled boards. That limitation deserves attention. Temperature changes can also alter stiffness; published WPC studies commonly report lower flexural performance as temperature rises. Record the heating time, surface temperature, radius, and cooling method for every trial. Small installation notes often reveal more than a neat laboratory number.
Heat Evenly Across a 10–15 cm Bend Zone Before Forming
How to Bend WPC Boards Safely?
Heat must travel evenly across a 10–15 cm bend zone before forming. Do not aim a heat gun at one spot. Move it slowly, like painting a wall, and rotate the board when possible. Use an infrared thermometer to check several points across the zone. The temperature difference should stay small, ideally within 5–10°C. WPC formulas vary widely. The USDA Forest Products Laboratory’s Wood Handbook reports that temperature, moisture, and fiber direction can significantly change wood-based composite behavior. ASTM D648 heat-deflection data for WPC materials commonly falls around 60–110°C, depending on the polymer and wood content. Treat these values as reference data, not a universal forming setting.
Tips: Check the supplier’s technical sheet first. Heat gradually, then test a short offcut. A 10–15 cm zone usually gives a smoother radius than a narrow hot spot. Support both sides of the board during forming. Wear heat-resistant gloves and eye protection. Stop if the surface darkens, blisters, smokes, or smells sharply. Never force a cold core around a hot skin. That creates hidden stress. I have found that patience matters more than maximum heat, although this is easy to forget on a busy installation site. Allow the formed board to cool while clamped. Inspect the inner radius for whitening, cracks, or spring-back before final fixing.
Cool Below 40°C, Then Inspect the Bend Against ISO 178 Criteria
How to Bend WPC Boards Safely?
Bending WPC boards requires controlled heat, steady pressure, and patience. Warm the board evenly, following the supplier’s recommended temperature range. Avoid local overheating, which can soften the surface while leaving the core rigid. Use a clean bending jig with a measured radius. Apply pressure gradually, without sudden pulling or twisting. I have found that rushing this stage often creates hidden stress. The bend may look smooth but still fail later.
Allow the formed board to cool naturally below 40°C before removing it from the jig. Do not use cold water or forced air. Rapid cooling can lock in uneven stress. After cooling, inspect both faces and the edges under bright, angled light. Look for cracks, whitening, surface ripples, delamination, and excessive springback. Measure the final radius and compare it with the drawing. ISO 178 evaluates flexural strength and modulus under defined laboratory conditions, so it should guide material verification, not replace a visual site inspection. For critical work, test a representative sample through an accredited laboratory.
Tips: Wear heat-resistant gloves and eye protection. Record the heating time, surface temperature, radius, and cooling result. Keep one failed sample for review. That mistake may reveal too much heat, insufficient support, or an overly tight radius. Never approve a bend based on appearance alone.


