How to Use a Belt Measuring Tool?
A belt can look close enough on a workbench and still slip, strain bearings, or refuse to fit. That is why a Belt Measuring Tool matters. It gives technicians a repeatable way to check a belt’s length before ordering or installation. The measurement is only useful, though, when the tool suits the belt type and the maker’s method. Small errors add up.
The U.S. Department of Energy’s 2014 report, Improving Motor and Drive System Performance, notes that motor systems account for about 68% of electricity use in U.S. manufacturing. That figure covers motor systems broadly, not belts alone. Still, it shows why dependable drive maintenance deserves attention. Gates’ industrial belt catalogs likewise distinguish belt profiles and measurement conventions, a useful reminder that one reading method does not fit every belt. In this guide, you’ll learn how to position a belt on the tool, apply steady tension, read the scale, and check the result against the equipment specification. A worn belt may measure differently from a new one. The tool cannot diagnose every cause of wear. It can, however, help reduce guesswork. That distinction matters. Before measuring, identify the belt profile and consult the manufacturer’s instructions; otherwise, a precise-looking number may still be the wrong one.
Understanding the Parts of a Belt Measuring Tool
How to Use a Belt Measuring Tool?
Understanding the Parts of a Belt Measuring Tool
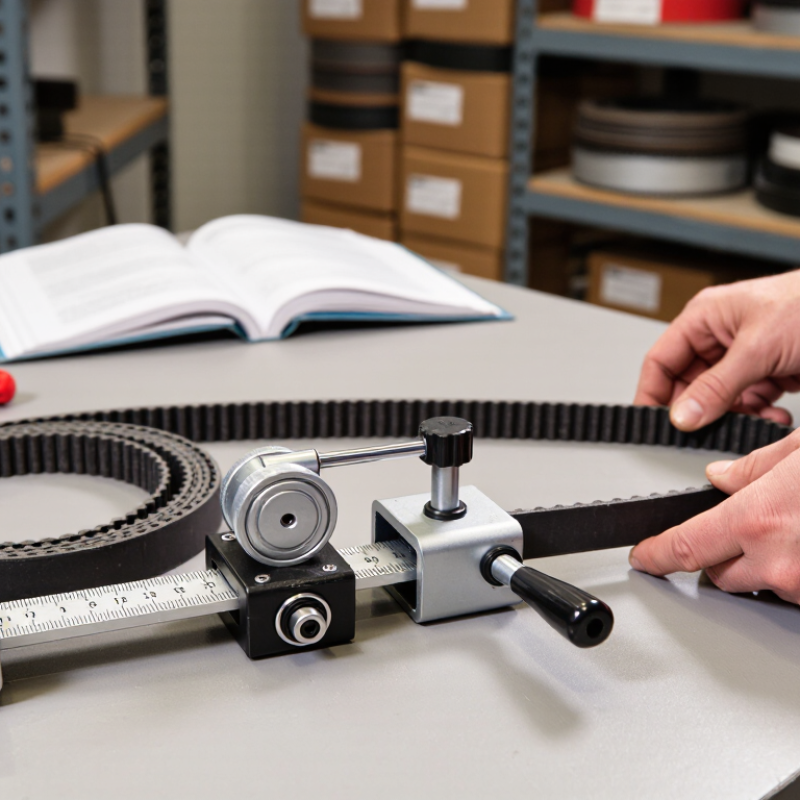
A belt measuring tool usually has a reference hook, a sliding carriage, a graduated scale, and sometimes a locking knob. The hook anchors one belt end or engages a pulley groove. The carriage moves along the body to match the belt’s length or width. The scale shows the reading, while the lock holds the carriage in place. Small parts matter.
Before measuring, check which scale the tool uses: some read belt length, while others check cross-section or wear. ISO 4184 sets reference-length conventions for V-belts, so a tool’s reading should match the belt’s specified measurement method. Check the zero. If the hook or carriage is worn, readings may shift; inspect both before trusting a close result.
Hold the belt straight against the tool without stretching it. Keep the reference edge flush, then read the scale at eye level to limit parallax error. Locking knobs can help preserve a reading, but excessive force may move the carriage. The U.S. Department of Energy’s motor-system sourcebook reports that properly selected belt drives can operate at efficiencies in the mid-to-high 90% range; accurate identification and fit help support reliable operation. I still recheck borderline readings, because a slightly tilted belt can look convincingly correct.
Choosing the Right Tool for Your Belt
How to Use a Belt Measuring Tool?
Choosing the Right Tool for Your Belt
Choosing a measuring tool depends on whether you are sizing a belt you own or buying one to fit your body. A flexible measuring tape works well around your waist, especially if you wear the belt over thicker clothing. Keep it snug, not tight, and measure where the belt will sit.
Small details matter.
A ruler or straightedge is better for a belt laid flat, since it will not follow the belt’s curves.
For an existing belt, use a tape measure to check from the buckle’s inner edge or fold to the hole you use most. Belt sizing methods can vary, so check how the seller defines its measurements before comparing numbers. If measuring your waist, stand naturally and keep the tape level; pulling it too tight can give a smaller, misleading result.
Not always obvious.
Record the measurement in inches or centimeters, and note what you wore during the fitting. A second measurement can catch a slipped tape or a bent belt. It is easy to trust a tidy number too quickly, so pause and check the starting point.
Preparing the Belt and Measuring Tool
Preparing the Belt and Measuring Tool
Start by identifying the belt type and the measurement your tool reads. A flexible circumference tool, for example, may not show the same reference length used for a V-belt. ISO 4184 defines reference-length conventions for classical and narrow V-belts, so check the relevant belt specification before comparing measurements. Clean the belt and tool; grit can interfere with contact. Inspect the belt for cracks, glazing, or stretched sections. A worn belt can give a misleading reading. Keep it relaxed.
Lay the belt flat on a clean surface, without twisting or pulling it tight. Seat the tool evenly against the belt, especially around curves, and keep its zero mark aligned. Record the reading, then repeat it once. If the results differ, check for slipping or a crooked tool rather than averaging blindly. For an installed belt, follow the tool maker’s stated method and isolate moving equipment before measuring. The U.S. Department of Energy’s Improving Motor and Drive System Performance sourcebook reports belt-drive efficiencies of about 95–98% under suitable selection and maintenance conditions. That range is a useful reminder: correct sizing matters, but the measurement alone cannot confirm belt condition, alignment, or tension. A slightly awkward reading deserves a second look.
How to Use a Belt Measuring Tool? — Preparing the Belt and Measuring Tool
Before measuring, remove the belt and inspect it for wear or damage. Lay it flat without stretching, check that the measuring tool is set to zero, and take each reading from the same reference point. These example readings show three repeat measurements of one belt; their average is 999 mm.
Measuring the Belt Step by Step
Measuring the Belt Step by Step
Before measuring, identify the belt type and check the measuring tool’s instructions. A belt-length gauge may measure a loose belt, while a tape or marked measuring board can help with a removed belt. If the belt is fitted to machinery, switch off and secure the equipment before working near it. Small movements can affect a reading.
For a loose belt, place it flat without pulling or stretching it. Feed it through the tool as directed, keeping the belt centered in the measuring track. Bring the ends together gently, then read the scale at eye level. Record the length and the belt’s width. Take the reading twice. If the numbers differ, check that the belt did not twist or slip.
For a belt still routed around pulleys, follow the tool’s method for measuring the installed path. Keep the belt seated in each groove, and apply only the tension the instructions specify. Too much tension can produce a misleading result. Note any printed belt code, but do not rely on it alone; wear and previous adjustments can change the fit. One easy detail to overlook is measurement units. Write down whether the reading is in millimeters or inches. A careful second check is worth the extra minute.
How to Use a Belt Measuring Tool? - Measuring the Belt Step by Step | Step | What to Do | How to Measure | Example / Check |
| 1 | Prepare the belt | Lay the belt flat on a level surface and straighten it without stretching the material. | Make sure the belt is not twisted or folded. |
| 2 | Position the measuring tool | For a belt with a standard buckle, place the tool’s zero point at the buckle pin or the point where the strap folds around the buckle, depending on the tool’s instructions. | Use the same starting point for consistent measurements. |
| 3 | Measure to the hole you use | Follow the belt’s centerline from the starting point to the center of the hole you normally fasten. | This measurement is commonly used to determine belt size. |
| 4 | Read and record the result | Read the tool at the center of the selected hole. Record the value in inches or centimeters. | Example: 36 in is approximately 91.4 cm. |
| 5 | Check the result | Repeat the measurement once and compare the readings. Keep the tool straight and aligned with the strap. | A repeated reading should be close to the first one. |
| 6 | Choose a replacement size | Use the measured buckle-to-used-hole distance as a sizing reference, then check the seller’s size chart because sizing conventions can vary. | Do not use the belt’s total tip-to-tip length as the size unless the chart specifically requests it. |
Note: If measuring your body instead of an existing belt, wrap a flexible measuring tape around the area where you wear the belt and keep it comfortably snug. One inch equals 2.54 centimeters.
Reading and Recording the Measurement
Before reading a belt measuring tool, identify what it measures: the belt’s outside circumference, inside circumference, or working length. These values are not interchangeable. For power transmission belts, ISO 4184 uses datum-length conventions, so measuring only the outer edge can produce a misleading comparison. Lay the belt flat, remove twists, and keep it relaxed; pulling it tight can change the reading. Check that the tool’s zero mark sits squarely at the starting point. Small details matter.
Read the scale at eye level, then record the value immediately with its unit and measurement method. For example: “1,240 mm, datum length” is more useful than “1,240.” NIST Special Publication 811 states that one inch equals exactly 25.4 millimeters, which helps when comparing records in different units. Convert only after noting the original reading, and avoid rounding early. I still double-check whether I recorded the inside or outside measurement; it is an easy detail to miss. If repeated readings differ, inspect the belt for twists or wear, reset the tool, and measure again. Keep the date and tool identification with the record so another technician can repeat the check.